


-
Nail polish in assorted colours.
-
Nail art pen /thin paintbrush
-
Dotting tool of some variety (I use a crochet hook, but things like toothpicks would work.)
Clean, rounded nails work best, & if you use a basecoat, now is the time to apply it.
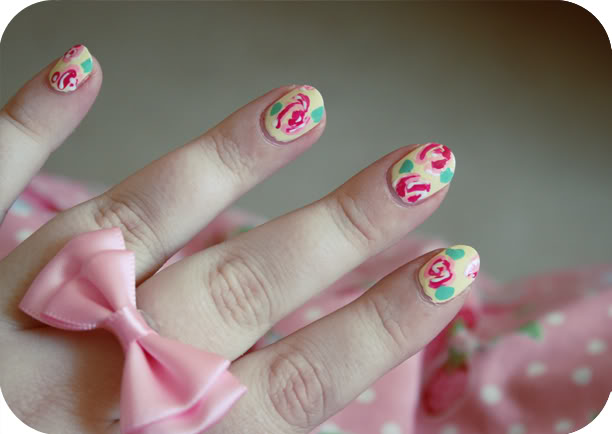
Firstly, paint your nails in your base colour of choice. This will be your "cup" colour.

Paint 5 stripes vertically up your nails. If you don't have a nail art pen, you can use a thin paintbrush or nail art brush.


Next, paint a thick line across your nails, halfway up. This will be your "cake" colour.

Now blob 3 dots over the stripe you just made, make sure not to cover it completely. Then fill in the space above the blobs with the same colour. This is your "icing" colour.

Now carefully blob a drop of colour at the tip of your nails. This is your "cherry".

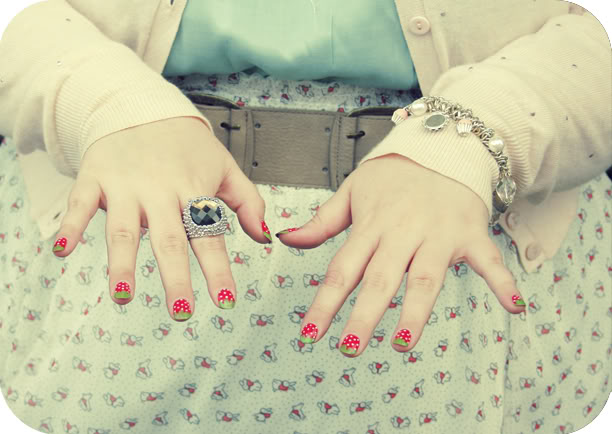
Your nails should now look something like this.

Now you can add your "sprinkles". Using a dotting tool or toothpick, carefully dot blobs of nail varnish onto the "icing" area.

You can go for one colour of sprinkles, or rainbow ones like I did.

Nail art finished! Add top coat & let dry.
I hope this helps some of you, nail art is much easier than it looks. If you have any questions, do let me know:)
Georgina